Creating a whitelist for your Project Zomboid server
If you would like a private server where people need a valid user/pass to join, creating a whitelist is necessary.
This is a bit more of a mess than it will be down the line, but once you're set up, it's pretty easy to manage.
The server will look in your zomboid database folder (pzserver/db) for a database file (PZServer.db) with username / passwords to authorize people trying to connect to your server.
1. Stop your server and navigate to File Manager option on the left-side menu.
2. Go to the following directory: pzserver/db and you will find PZServer.db file. You will need to click on ... => Download option.

3. Next, download this: SQLite Admin It's for editing file based sql (sqlite) databases.
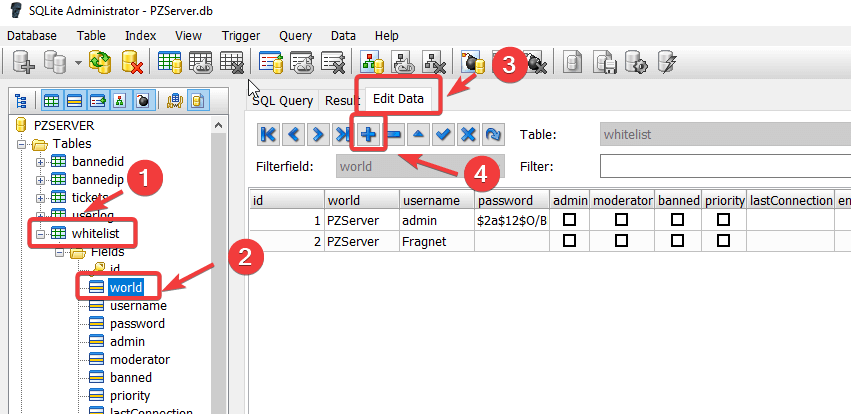
4. Go into Tables, click whitelist, expand it out and click a random field (say id)
5. Click the Edit Data tab to put data in. All you need to do to add a user is click the + icon, and then (in order) put PZServer into the 'world' column, then add a username and password into their respective columns. Close the database once you've made changes, and it'll auto save.

6. Upload the modified file onto the server to replace the existing one with the Upload button or drag and drop function.
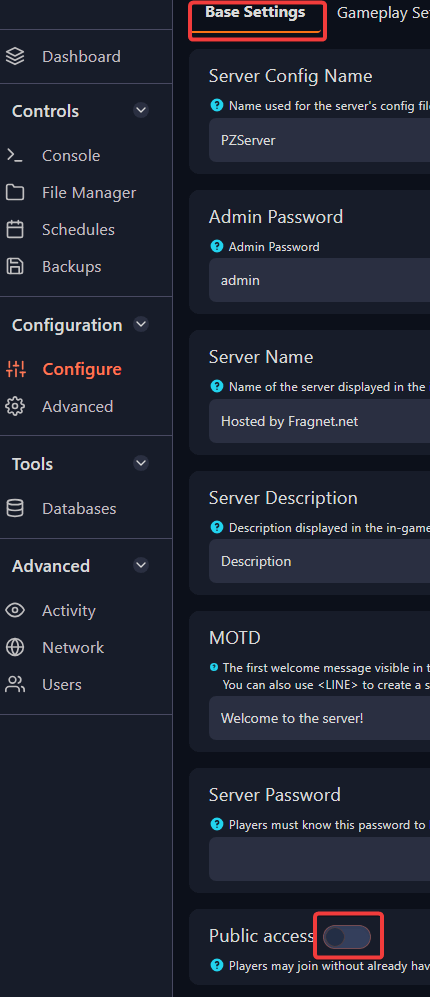
7. Now navigate to Configure option on the left-side menu and disable Public Access in Base Settings.

8. Start your server, and whitelist will be enabled.