Add a custom mission to your Arma 3 server
An Arma 3 mission is a .pbo file, for example MyMission.Altis.pbo. The part after the first dot is the map the mission runs on, here Altis.
If the mission needs mods, install them first on the Workshop tab. See Install Workshop mods.
Upload the mission
- Open the Fragnet dashboard, go to My servers and select your server.
- Select the Files tab and open the
mpmissionsfolder. - Select Upload and choose the
.pbofile.
Files over 100 MB are easier to upload over SFTP. See Files and SFTP and How to access your server files using FTP.
Missions that come with a mod
Some mods, such as Antistasi, bring their mission with them. You don't upload anything: install the mod on the Workshop tab. The mission's name comes from the mod, so check the mod's Workshop page for it.
Make the server load the mission
- Open the Configuration tab and select server.cfg.
- In the Missions card at the top, type the mission name in the empty box, or pick it from the list. The list shows the missions in your
mpmissionsfolder. The name is the file name without.pbo, for exampleMyMission.Altis. - Select Add mission. The server plays the missions in the list in order. Pick the mission's difficulty in the box next to it.
- Select Save and restart, or Save and restart the server later.
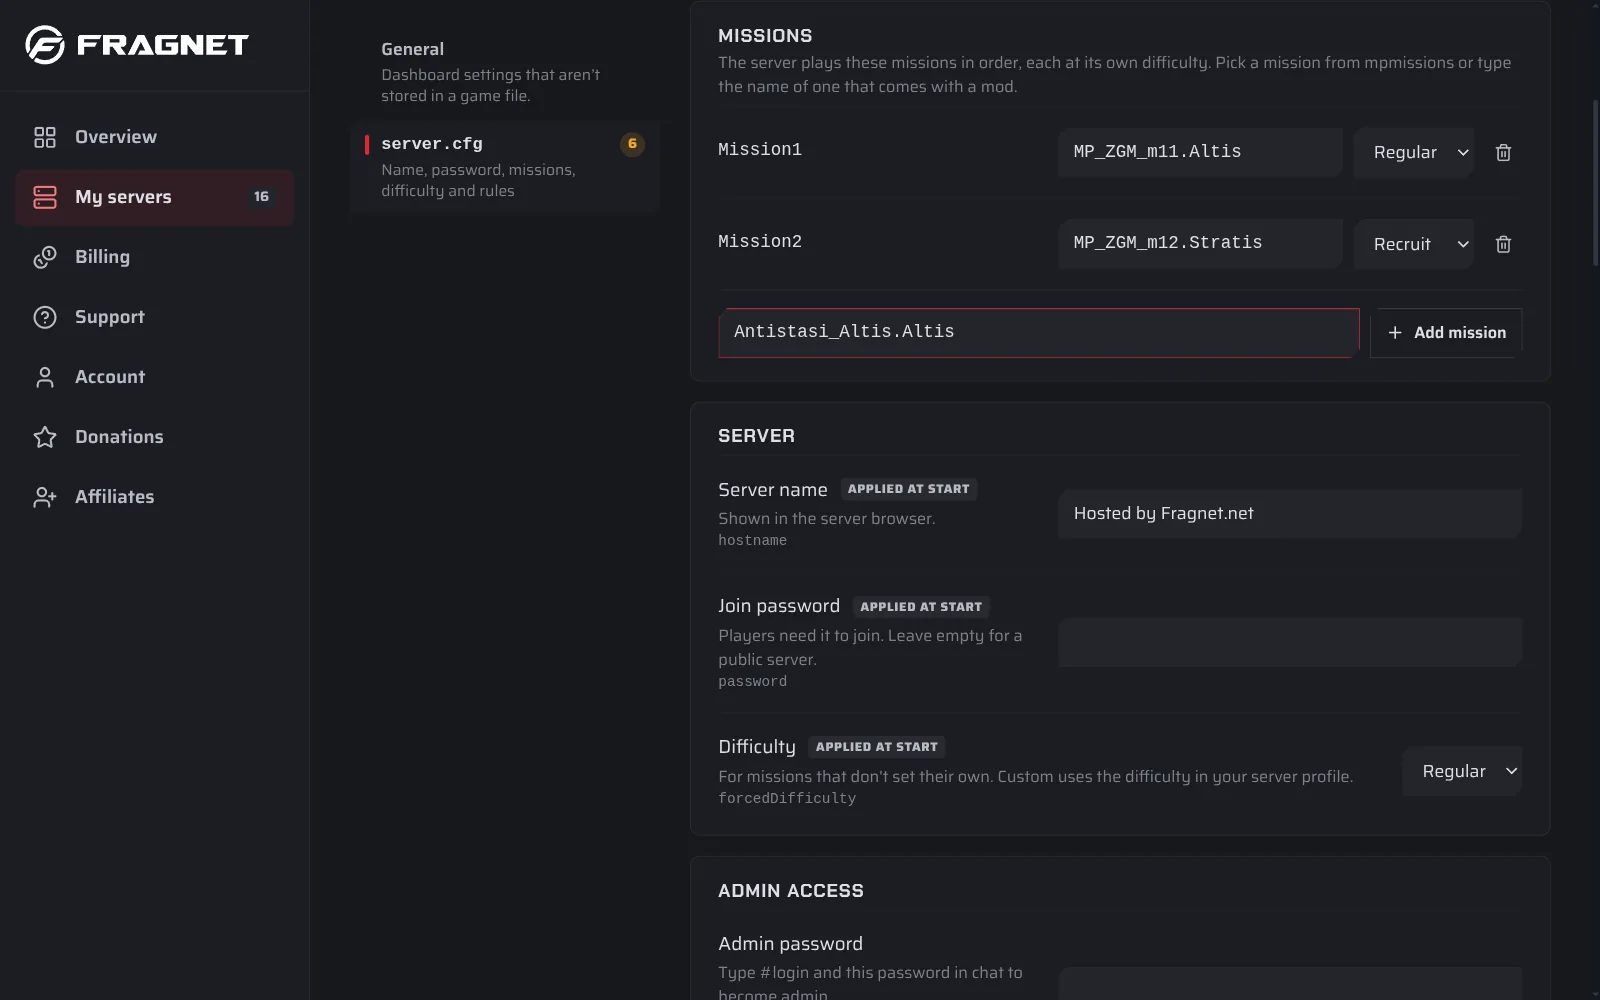
To stop a mission from loading, select the bin icon next to it. See Change your server's settings for the rest of the page.
In the server.cfg file itself, the mission list looks like this:
class Missions
{
    class Mission1
    {
        template = "MyMission.Altis";
        difficulty = "Regular";
        class Params {};
    };
};
Pick a mission in game
An admin can also pick the mission in game. Log in as admin and type #missions in the chat to choose from the missions on the server.