Install Workshop mods on your Arma 3 server
You install, update and remove Steam Workshop mods for Arma 3 on the Workshop tab of your server in the Fragnet dashboard. The dashboard downloads the mods, copies their keys into the server's keys folder, adds them to the server's launch line and keeps track of their load order.
Make a backup before you add or remove mods, so you can go back if the server doesn't start. See Creating a backup.
Open the Workshop tab
- Open the Fragnet dashboard, go to My servers and select your server.
- Select the Workshop tab. If you don't see it in the row of tabs, look under More.
The list on the left has these views (on small screens they're in a drop-down at the top):
- Browse Workshop: search the Steam Workshop for Arma 3 mods and collections.
- Installed: the mods on your server and their Load order.
- Updates: installed mods with a newer version on Steam.
- Custom mods (under Uploads): mods you upload yourself as a
.zipfile.
Below the list are Mass install, Import Launcher preset and Check for updates. On small screens they're the buttons next to the drop-down.
Search for and install a mod
- Select Browse Workshop.
- Type the mod's name or Workshop ID in the search box. Sort by sorts the results by Most subscribed, Recently updated, Trending or Newest.
- Select Install next to the mod. To install several, tick them and select the Install button at the bottom (for example Install 3 mods). The bar also shows how much there is to download.
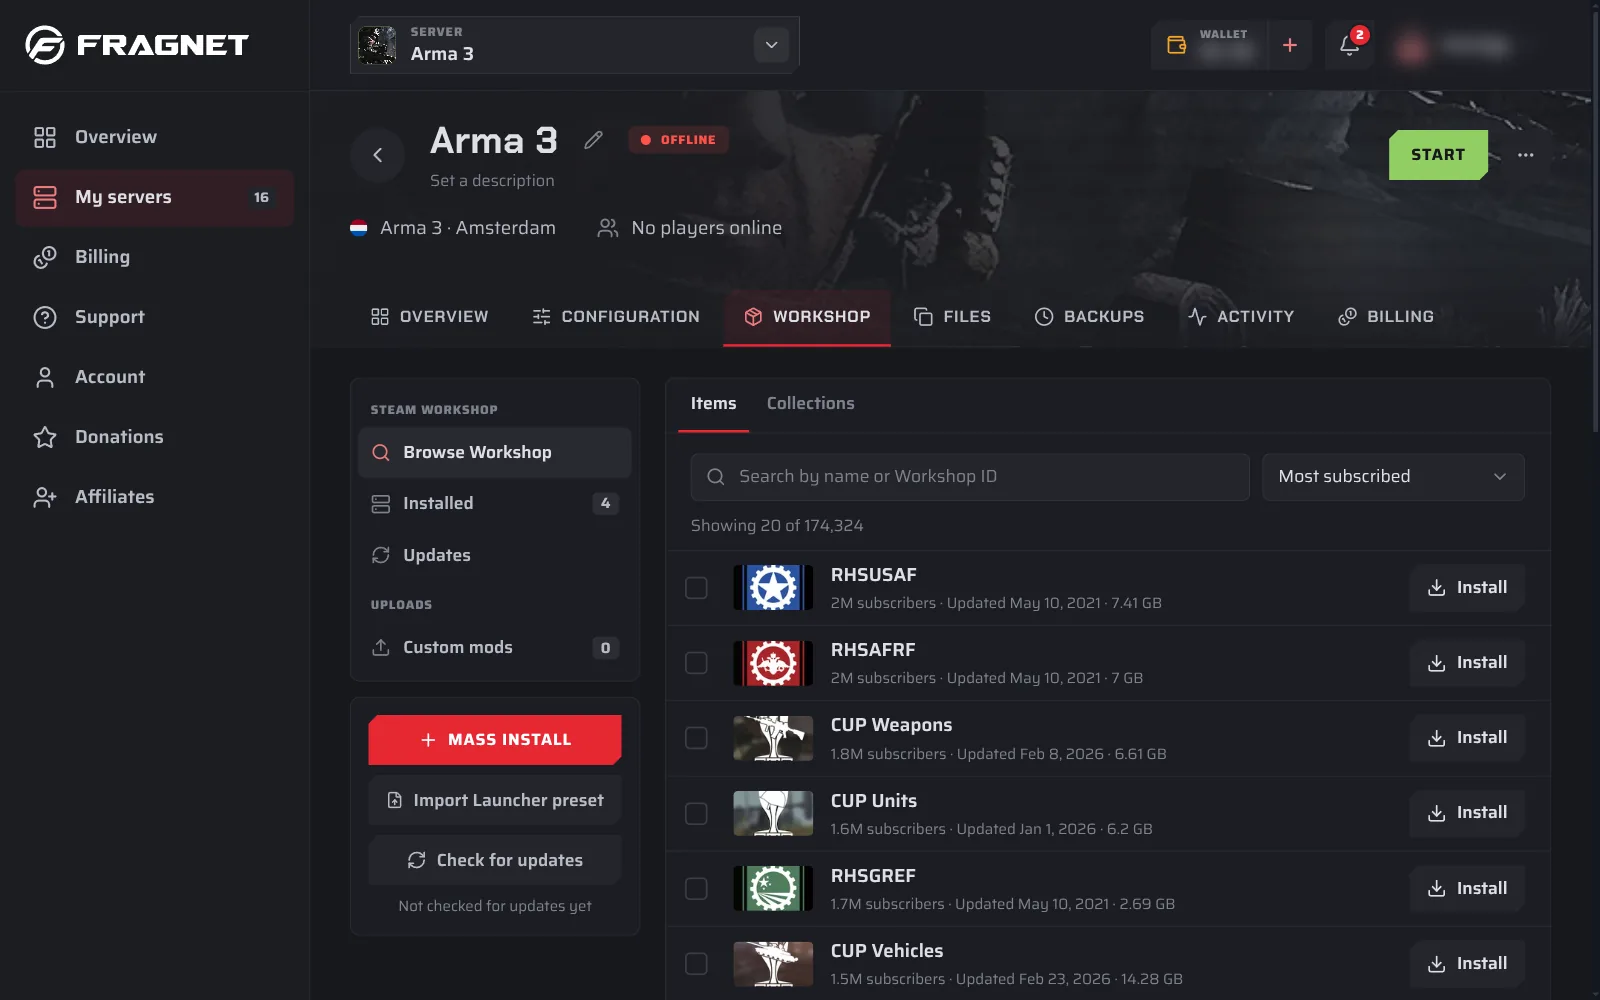
Mods that the chosen mod lists as required items on Steam, such as CBA_A3, are installed with it.
Import an Arma 3 Launcher preset
If you already play with a set of mods, export it from the Arma 3 Launcher and import it here.
- In the Arma 3 Launcher, open Mods, then Preset, then Export. This saves an
.htmlfile. - On the Workshop tab, select Import Launcher preset.
- Select Choose preset file and pick the
.htmlfile. - Check the list. Each mod shows whether it's New, already Installed or Not available, and you see how much there is to download.
- Select Install (for example Install 24 mods).
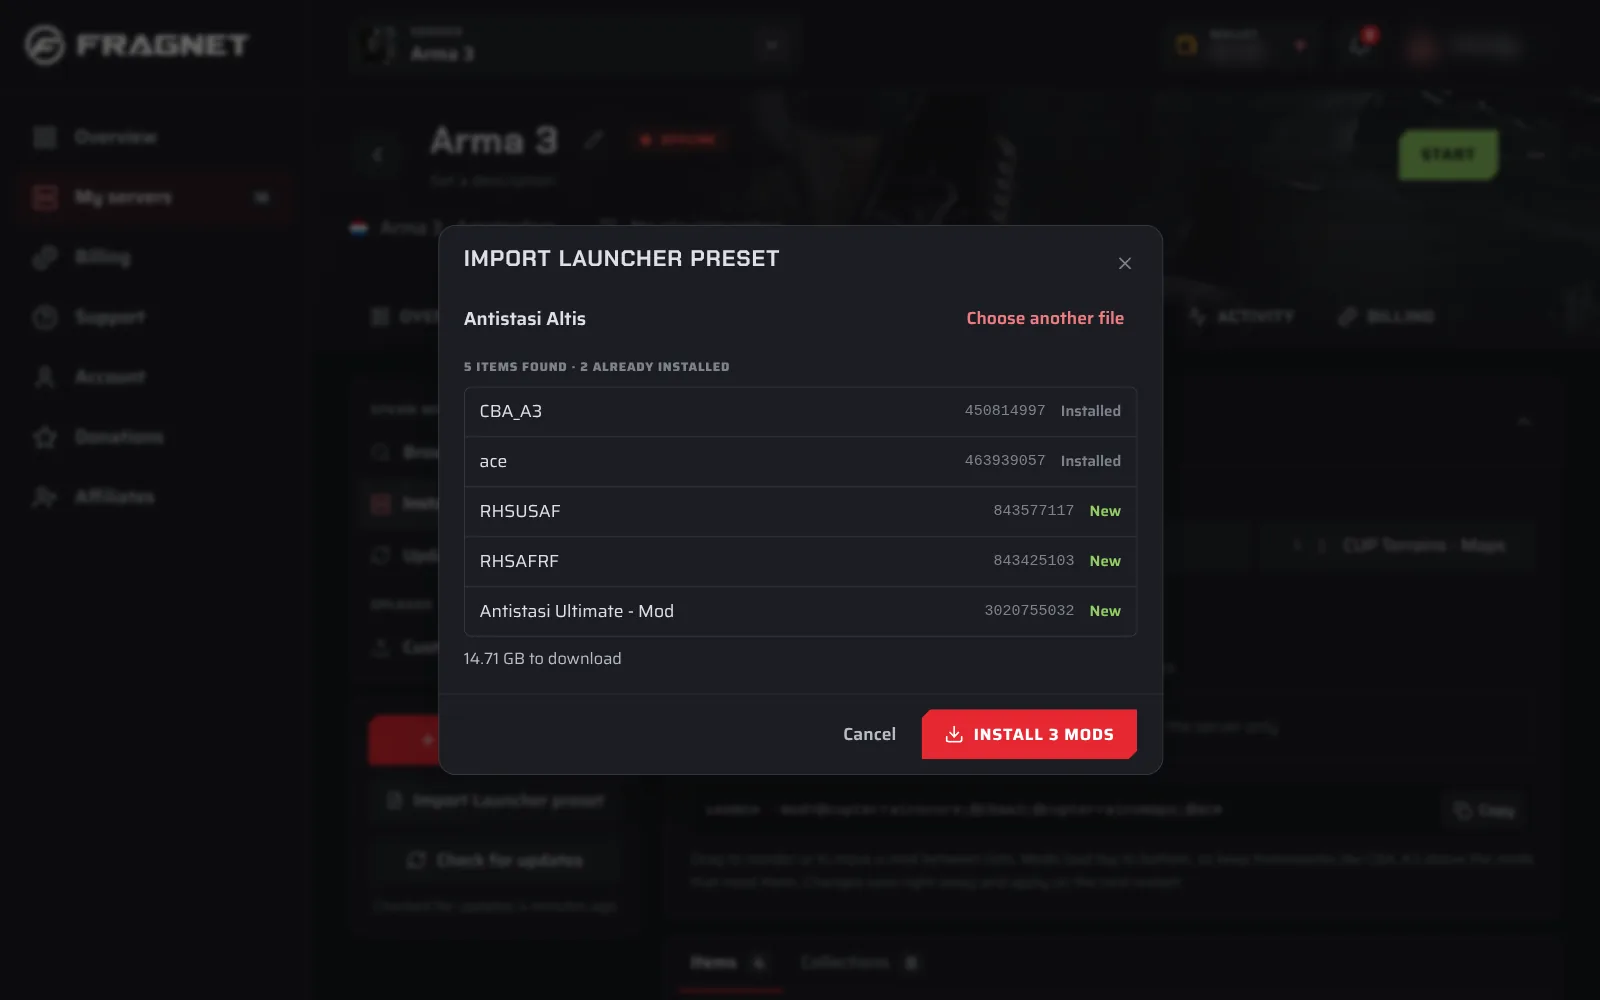
A preset can have up to 150 mods. The list may also show:
- Not on the Workshop: mods the Launcher loads from your own computer. Select Upload custom mods to upload them (see Upload a custom mod).
- DLC in this preset: for information only. The import doesn't install DLC.
Install several mods by ID
- Select Mass install.
- Choose how to install:
- IDs or links: paste Workshop IDs or item links, one per line or separated by commas. You can install up to 50 at a time.
- Collection: paste a Workshop collection link or ID. Mods you already have are skipped.
- Check what was found, then select Install (for example Install 12 mods).
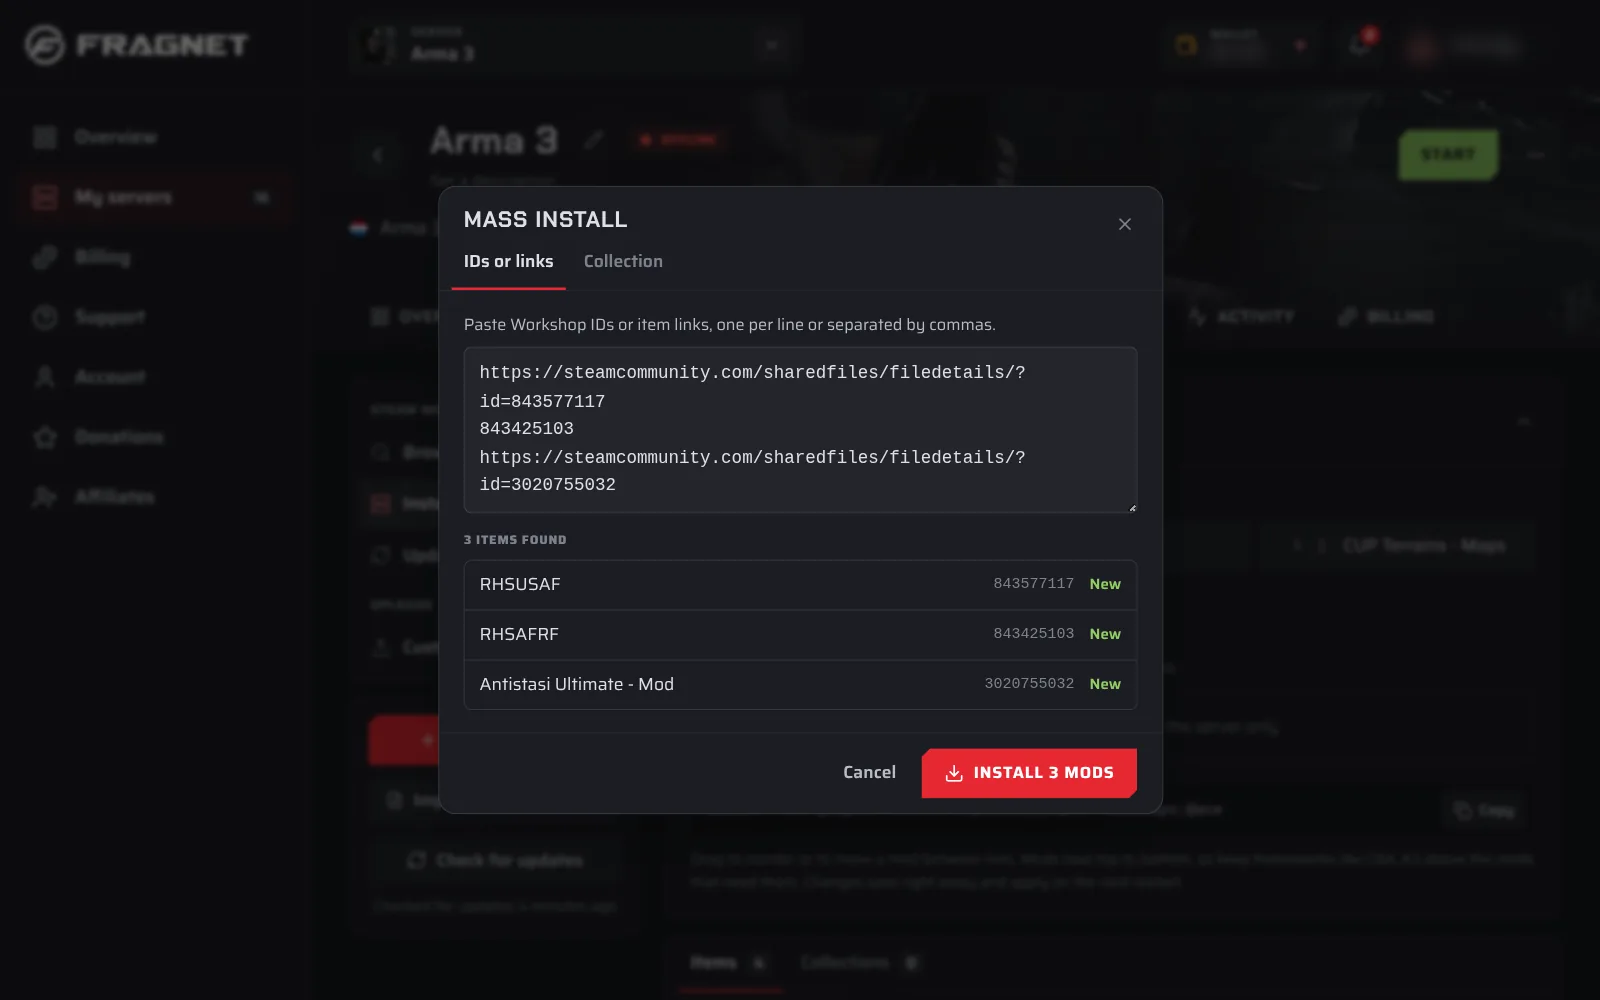
A mod's Workshop ID is the number at the end of its Steam Workshop address, for example 450814997 in https://steamcommunity.com/sharedfiles/filedetails/?id=450814997.
Follow the download
The download shows at the top of the Workshop tab, for example "Downloading 12 mods · 3 of 12 done". The mod that is downloading now shows how much has arrived and a percentage. Select Cancel to stop the download.
- Large mods can take a long time. The download keeps going if you leave the page.
- Only one download runs at a time. Wait for it to finish before you start the next.
- If a mod fails, the tab tells you why. For example, "Steam is limiting downloads right now. Try again in an hour."
Restart to load the mods
Arma 3 loads mods when it starts. After you install, enable, disable or reorder mods, a bar at the top of the Workshop tab tells you how many mod changes are waiting:
- If the server is running, select Restart now. Players are disconnected during the restart.
- If the server is stopped, select Start server.
Load order
Select Installed to see the Load order card. It has two lists:
- Client mods (loaded with
-mod): players need these too. - Server-side mods (loaded with
-servermod): only the server loads these.
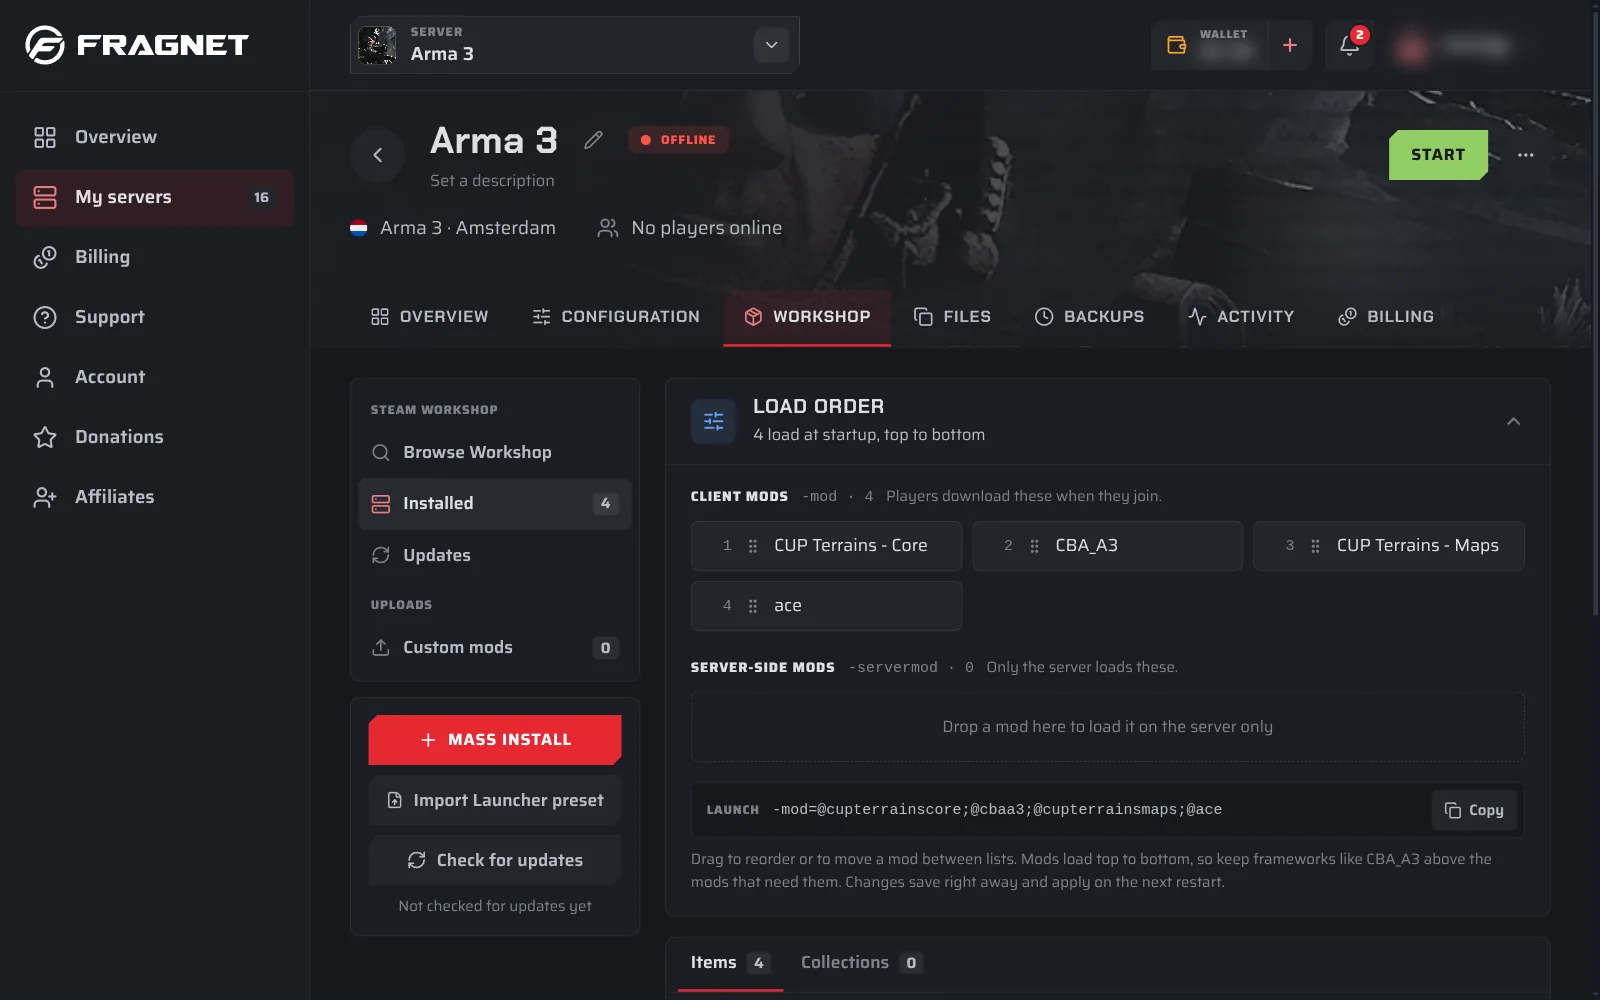
Mods load top to bottom. Keep frameworks such as CBA_A3 above the mods that need them. Drag a mod to change its place or to move it to the other list. On a phone, use the arrows next to each mod. Changes save straight away and apply on the next restart.
Below the lists, Launch shows the mod parameters the server starts with. Select Copy to copy them, for example for a support ticket.
Update and remove mods
To update mods:
- Select Check for updates. The Updates view lists the mods that have a new version on Steam.
- Select Update next to a mod, or Update all.
- Restart the server so the new versions load.
To install updates without doing it by hand, select a mod in the Installed view and turn on Scheduled updates. Then add a Workshop task to a restart schedule. See Schedule tasks.
To remove a mod, select it in the Installed view and select Uninstall. Its files are deleted from the server. To change several mods at once, tick them in the Installed content list and select Enable, Disable or Uninstall. Disabled mods stay installed and keep their place in the load order.
If other mods need the mod you disable or uninstall, the dashboard warns you ("Other mods need this") and offers to change those mods too.
Disk space
Mods take up disk space, and some Arma 3 mods are many gigabytes. Before you install, the dashboard shows how much there is to download. If the mods don't fit, it says "These mods don't fit on the server's disk".
To make room, uninstall mods you don't use, or delete old mod folders on the Files tab. The Disk usage card on the Files tab shows how much space you use. See Files and SFTP.
Upload a custom mod
For a mod that isn't on the Steam Workshop:
- On your computer, zip the mod folder, for example
@MyModwith itsaddonsandkeysfolders. - On the Workshop tab, select Custom mods.
- Drop the
.zipfile on the upload area, or click it to choose the file. - The dashboard uploads and unpacks the zip and adds the mod. It appears in the load order with the Custom tag.
Mod folder names start with @ and can only use letters, digits, dots, dashes and underscores. Check on the Files tab that the mod's .bikey file is in the server's keys folder. If it isn't, upload it there.
Moving from uploaded mod folders or a preset file
Before the Workshop tab, Arma 3 mods were set up in two other ways. Here is how to move them to the Workshop tab.
You used a preset file in your startup settings
Your server downloaded its mods from a Launcher preset file every time it started. The import moves them to the Workshop tab:
- Stop your server.
- Open your server's Workshop tab and select Import Launcher preset.
- Select Use mods.html from your server (the button shows your own file's name) and check the mod list.
- Leave Delete the old copies ticked and select Install.
- If it says the mods don't fit next to the old copies, select Remove old copies and retry.
- When the download has finished, start the server.
You don't need to delete anything yourself. The import removes the old mod folders, and the mods download again under new folder names, with their keys copied for you. The import also clears the preset file from your startup settings, so the server stops downloading mods every time it starts.
If all the mods are already installed, the button says Stop loading followed by the file name. It only clears the preset file from your startup settings.
Your mods then appear under Load order, where you can drag them into place. Keep CBA_A3 above the mods that need it.
You uploaded mod folders by hand
Mod folders you uploaded yourself (such as @CBA_A3) are loaded through a startup setting called MODIFICATIONS. The import doesn't change that setting. To move these mods to the Workshop tab:
- Install the same mods on the Workshop tab: search for them, use Mass install, or import a Launcher preset.
- Open the Configuration tab. If it shows a list on the left, select General. In the Startup group, remove those mods from the setting that lists them (
MODIFICATIONS) and select Save. Otherwise the server loads them twice. - On the Files tab, delete the old
@folders of those mods to free disk space. - Restart the server.
A mod that isn't on the Workshop can stay in MODIFICATIONS. Or remove it there and upload it as a custom mod.